| Titel: |
Titel:
Evaluating and visualizing the quality of surface points determined from computed tomography volume data
|
| Autoren: |
Autoren:
Fleßner, Matthias, ORCID: 0000-0002-6591-9988Müller, Andreas, ORCID: 0000-0002-3213-309X Helmecke, Eric Hausotte, Tino, ORCID: 0000-0002-2923-3217 |
| Beitragende: |
Beitragende:
HostingInstitution: Physikalisch-Technische Bundesanstalt (PTB), ISNI: 0000 0001 2186 1887
|
| Seiten: |
Seiten:
8
|
| Sprachen: |
Sprachen:
en
|
| DOI: |
DOI:
10.7795/810.20150223A
|
| Art der Ressource: |
Art der Ressource:
PTB: Konferenzartikel,
DINI: ConferencePaper,
DataCite: ConferencePaper
|
| Verlag: |
Verlag:
Physikalisch-Technische Bundesanstalt (PTB)
|
| Datumsangaben: |
Datumsangaben:
Verfügbar:
2015
|
| Klassifikationen: |
Klassifikationen:
PACS 06.20.-f Metrology ; PACS 07.05.Pj Digital imaging, image processing algorithms ; PACS 81.70.Tx Computed tomography (in materials testing) ; OCIS 100.6950 Tomographic image processing ; OCIS 120.3940 Metrology ; OCIS 120.4290 Nondestructive testing
|
| Datei: |
Datei:
Datei herunterladen
(application/pdf)
629.9 KB
MD5 Prüfsumme: 341f4fe7f8b32fb834b6b63a08e5afe2 SHA256 Prüfsumme: 6023d54c188ec9d198d577433c92e532ccd0327cd3a97a1de4f476c2592c6988 |
| Stichwörter: |
Stichwörter:
dimensional metrology ;
computed tomography ;
artefacts ;
surface determination ;
surface point quality
|
| Zusammenfassung: |
Zusammenfassung:
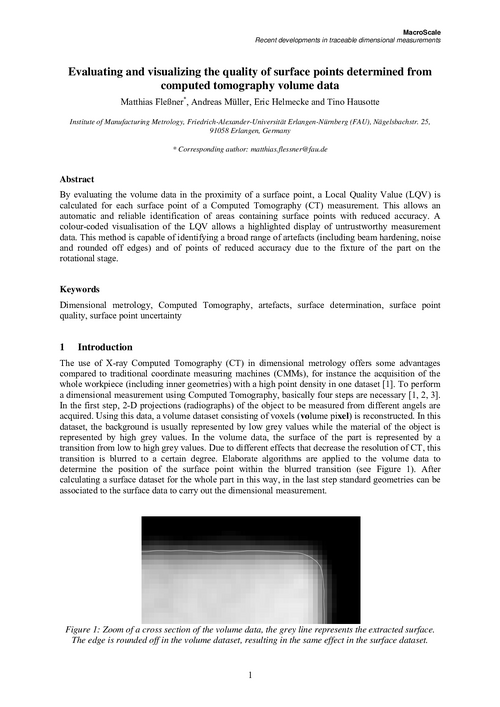
The ongoing progress of manufacturing metrology makes it possible to carry out dimensional measurements in volume datasets obtained by X-ray Computed Tomography (CT) with increasing accuracy, but high quality volume data is a basic prerequisite for this. However, data artefacts (for example stripe artefacts caused by beam hardening or increased noise due to long penetration lengths) or rounded edges (due to the limited resolution of the CT system) may lead to a locally reduced quality of the extracted surface points. As a result, the single point uncertainty varies locally. To facilitate a correct interpretation of the measurement results, it is crucial to identify the regions containing surface points of reduced accuracy. By evaluating the volume data in the proximity of a surface point, a Local Quality Value (LQV) is calculated for each surface point of a CT measurement. For an ideal volume dataset, a sharp, high-contrast, symmetric and noise-free transition from low to high gray values perpendicular to the surface is expected. Any deviation from this ideal behaviour complicates the extraction of the surface point and therefore is judged as decreasing the quality of the surface point. The method allows it to identify artefacts automatically and reliably, without the need for any additional information like a CAD model. A colour-coded representation of the LQV allows a clear and comprehensive depiction of areas with increased single point uncertainty.
|
| Anderes: |
Anderes:
This article is based on a presentation at the conference "MacroScale 2014 - Recent developments in traceable dimensional measurements", Vienna (Austria), 28th-30th October 2014.
|
| Zitat: |
Zitat:
FLEßNER, Matthias, Andreas MÜLLER, Eric HELMECKE and Tino HAUSOTTE. Evaluating and visualizing the quality of surface points determined from computed tomography volume data. Physikalisch-Technische Bundesanstalt (PTB), 2015. doi: 10.7795/810.20150223A
|
| Bemerkung: |
Bemerkung:
This article is based on a presentation at the conference "MacroScale 2014 - Recent developments in traceable dimensional measurements", Vienna (Austria), 28th-30th October 2014.
|
Autoren
Fleßner, Matthias, ORCID: 0000-0002-6591-9988
Müller, Andreas, ORCID: 0000-0002-3213-309X
Helmecke, Eric
Hausotte, Tino, ORCID: 0000-0002-2923-3217
Müller, Andreas, ORCID: 0000-0002-3213-309X
Helmecke, Eric
Hausotte, Tino, ORCID: 0000-0002-2923-3217


